From volume 88, summer 2007-08
By Dave Gauthier and Dr. Bruce Jamieson
INTRODUCTION
In 2003 Juerg Schweizer and others posed the following important questions for future research: How can field workers test for propagation propensity? Which properties of a slab and weak layer describe the fracture propagation propensity?
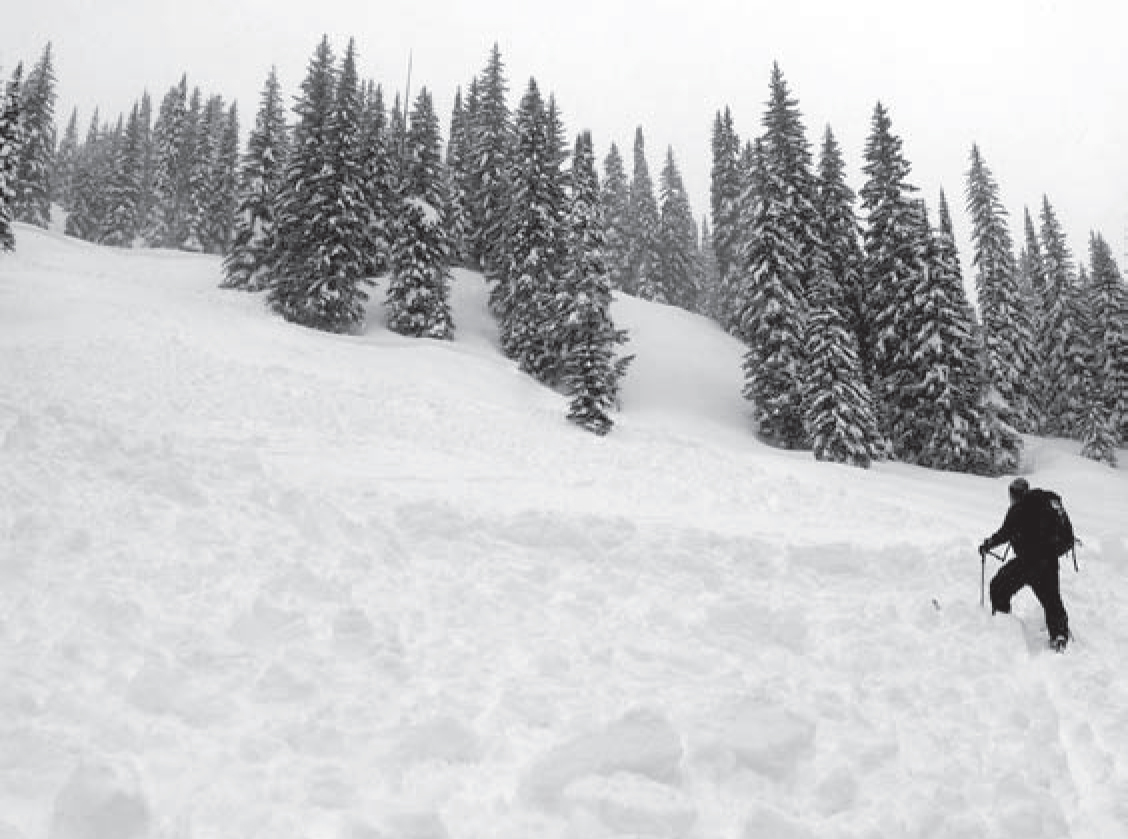
Photo 1: This is a size 3.0 avalanche that we triggered from a safe place 150 m away in February 2007. Propagation propensity was clearly very high here, and we didn’t need a field test to observe it!
In this article, we’re reporting on three years of work at the University of Calgary (ASARC) spent trying to answer the first question: How can we test for propagation propensity in the field? One of the main objectives of this work was to develop and verify a practical testing method, one that was intuitive, easy to do, easy to interpret, and could provide practitioners with specific information about the fracture propagation propensity of any slab-weak layer combination. Photo 1 shows a case of very high propagation propensity.
In recent years, we’ve seen some exciting advances towards addressing the propagation problem in field tests. Fracture character, shear quality, and release type observations are becoming widely used and accepted additions to the standard compression test (CT) and Rutschblock test (RB) results, and have been shown to relate to propagation propensity. At the 2006 ISSW, Ron Simenhois and Karl Birkeland presented their “extended column test” (ECT) as a new method specifically designed to investigate propagation propensity in the field. They presented an amazing dataset showing that the ECT was almost perfect in predicting skier and explosive triggered slab avalanches, and the method is already widely used by the American avalanche community.
Each of these new observations and methods use some sort of surface loading or impact (taps on a shovel or a jumping skier) to initiate weak layer fracture, which of course leads to the propagation of that fracture across the test column. Our approach to the problem was to design a test method that didn’t rely on fracture initiation by surface loading. This isn’t a criticism of the CT, RB, or ECT. In fact, we were mostly trying to find a way to separate fracture initiation and propagation in the test column, so that we could focus on the propagation part in our analysis.
We eventually settled on a method that uses an extended column design like the ECT, only oriented parallel to the fall-line, with the fracture initiated by gradually cutting into the weak layer with a regular snow saw. We’re calling it the “propagation saw test” (PST). Aside from making the analysis simpler—in that we could easily separate initiation and propagation in the test results—this method has a further advantage over the others in some cases. With no surface loading, we can test weak layers of any depth in the snowpack (i.e. Photo 2). Where the CT, RB, and ECT are limited to weak layers down 1.0-1.2 m, we have tested weak layers with up to three metre thick slabs. The limitation was only how much digging we were willing to do!
Before reading further, it’s important to remember that we’re not trying to reinvent slope scale instability assessments, or take experience and local knowledge out of avalanche forecasting and decision making. In fact, we’re not even trying to replace the CT, RB, ECT, or any other method in widespread use. We’re simply trying to provide one more tool to help practitioners answer a specific question about a specific part of the avalanche release problem: What will happen once a fracture is initiated in this weak layer? Will it propagate far and wide? What is the propagation propensity of this slab and weak layer combination?
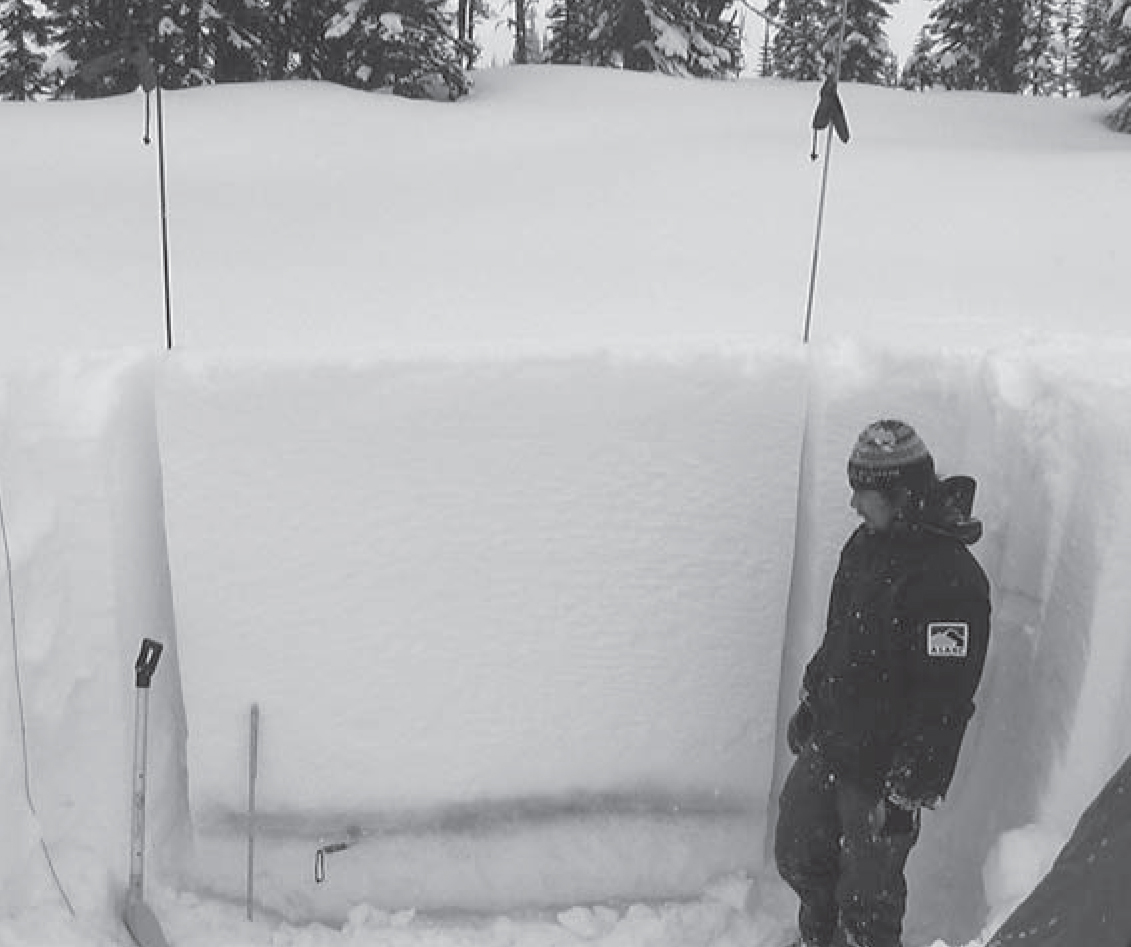
Photo 2: The slab we tested here was over 150 cm thick, and results from testing on this flat terrain were almost perfectly reproducible on nearby slopes. The PST works with slabs of any thickness, but columns like these can take 30-45 minutes to prepare. The three metre thick ones take hours.
TEST METHOD
Terrain/Snowpack/Site Selection
Unlike almost every other instability test, the PST requires that the user choose a specific weak layer to test. Often, local knowledge, experience, or operational objectives determines the layer(s) of most interest for information about propagation propensity, especially for the deep ones. Other times, a fracture line profile, test profile or a CT or RB might identify a weak layer that warrants further investigation. As we already mentioned, there is no real limit to the slab thickness or depth of weak layer that can be tested with the PST, other than the time and effort required to excavate and prepare the test column. It can be very tricky to get a 3m tall column perfectly aligned and shaped to the correct width, and they can tip over and crush you if you aren’t careful.
In developing the PST we spent a lot of time in the field doing experiments to investigate the effects of several variables on test results. In terms of terrain and site selection, we could rarely detect the effect of slope angle on test results. Where there was some slope dependence, it was minor. This means that—spatial variability notwithstanding—we could do a test on the flats at the top of a slope, and get the same results as if we did the test right on the slope. This is an advantage in many cases where you can’t access the start zone safely, or don’t want to dig a huge pit in the middle of a run. Other than the freedom to test any slope angle, and apply the results to adjacent slopes, we recommend the same approach to site selection that you would use for other methods.
Test Columns
Figure 1 is a photo of a fully prepared test column. Like the ECT, we use an extended column design. However, in the PST the column is 30 cm wide across-slope, and 1 m long down-slope. The column must be isolated completely from the surrounding snowpack, to a depth below a weak layer of interest. Note that if the slab is thicker (vertically) than 1 m, the down-slope length of the column should be extended so that it is approximately equal to the slab thickness. A length-greater-than-height geometry is required.
We almost always used a Rutschblock cord and two probes to create the side wall and to isolate the column. It’s a good idea to highlight the weak layer with a soft paintbrush or the back of a glove. This makes it much easier to follow thin weak layers with the saw, and helps identify the softest parts of thicker layers.
Test Method
Once the column is isolated, insert a standard snow-saw completely into the weak layer at the down-slope end of the column, non-serrated edge first. Next, quickly drag the saw through the weak layer towards the upslope end of the column. At some point during the cutting, weak layer fracture will start propagating rapidly ahead of the saw. Stop cutting and keep the saw in place, and try to watch the very rapidly propagating fracture. One of three things will happen:
- the fracture will run all the way up the column to the upslope end and the slab will be completely detached; or
- the fracture will propagate a short distance and stop when the slab fractures (like a crown); or
- the fracture will propagate a short distance and seem to stop for no good reason.
The important observations for interpreting the results of the test are:
1. Did you cut more than half (> 50 cm) or less than half (< 50cm) of the test column when propagation started?
2. Did the fracture propagate the whole way across the column, or did it arrest within the column?
Our verification studies, described in the next section, showed that these two pieces of information (the amount of column that was cut and whether or not the fracture crossed the entire test column) are all you need to say something about the propagation propensity of the slab-weak layer combination.
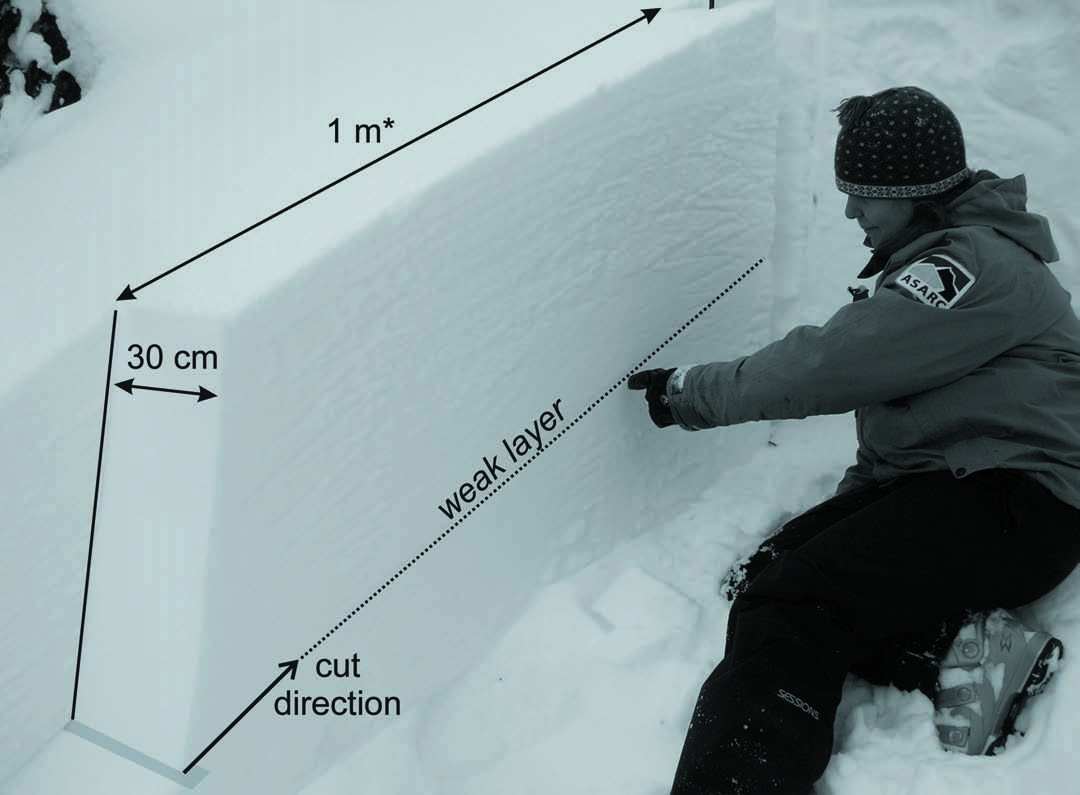
Figure 1: Photo of a propagation test column showing the dimensions and cut direction. We usually prepare the side wall and isolate the column with a rutschblock cord and two probes. Make sure the column is completely isolated from the surrounding snowpack to a depth below the weak layer of interest.
VERIFICATION STUDIES
Method
One of the most difficult parts of this project was trying to figure out a way to “test the test.” The usual approach would be to ski-cut a slope and, based on the results, classify it as stable or unstable, and then compare the field test results with the ski-cut results. For this study, we needed to find a way to observe initiation and propagation separately, and then compare those observations to the field test results.
Of course, when a ski-cut resulted in an avalanche we could say for sure that we had fracture initiation and propagation. On the other hand, when the ski-cut didn’t result in an avalanche, we knew that a fracture hadn’t propagated, but in order to say anything about propagation propensity we needed to know whether or not we had initiated a fracture in the weak layer. If the ski-cut did fracture the weak layer, but it hadn’t propagated, we could say that there is low or no propagation propensity there. However, if there was no initiation we couldn’t say anything about propagation.
Our approach was to dig out the ski tracks in a few places whenever we had no result from a ski-cut, and take a good look at the weak layer to see if we could find evidence of fracture initiation around the skis. This way we had an objective observation of propagation propensity to compare with the test results. Photo 3 is an example of one case where we did find initiation, but not propagation.
Over the course of the 2007 field season, we made observations on 18 slopes with observed initiation and propagation, five with initiation but no propagation, and five with no initiation. Most of our results came from the 4 February 2007 weak layer, although we tested it in many locations around Blue River and Rogers Pass, where it was well-developed surface hoar, and around Kicking Horse Mountain Resort where it was a thin faceted layer.
Results
Propagation likely (if triggered): Our results showed that if less than half of the column was cut when propagation shot ahead of the saw, and the fracture propagated to the end of the isolated column without arrest, fractures—once initiated—were likely to propagate and cause a whumpf or avalanche. In our dataset this prediction was correct every time, provided the test column was the correct length.
Propagation unlikely (if triggered): If we had to cut more than half of the test column when propagation started, or if propagation arrested at slab fractures or for any other reason before reaching the end of the column, we found that weak layer fractures were unlikely to propagate once triggered. These predictions were correct 72% of the time in our dataset. This means that in 28% of cases where the test was predicting low or no propagation propensity, we were right next to skier-triggered avalanches or whumpfs. These “false stable” predictions are particularly dangerous, and it’s very important to understand where and when they might occur.
The false stable predictions in our dataset generally occurred in thinner and softer slabs than the correct predictions. In most of these cases the compression test and Rutschblock test predicted the unstable conditions correctly. Therefore, it’s very important to be cautious when interpreting the propagation saw test results in thin and soft slabs, especially soon after the weak layer is buried and the layer is just becoming active.
Comparisons
At each test site, we always did two or more compression tests and observed fracture character, usually did a Rutschblock test and observed release type, and always did a detailed profile and calculated Yellow Flags for the slab and weak layer. We then used the standard interpretation rules for predicting skier-triggering with these methods, and compared them to the predictions of the propagation saw test and our observations of initiation and propagation on the slope. We weren’t trying to determine which one is the best instability test, but we were trying to understand which one was giving the best information about the propagation part.
Our results showed that the propagation saw test was just slightly better overall, but had many more false stable predictions than the other methods. However, the standard methods had many more false unstable predictions. The standard methods often overestimate instability, because they are testing initiation and propagation, whereas the saw test captures the propagation part better. When we analyzed only the cases of observed initiation with and without propagation, the saw test performed better than the other methods, mainly because it was much better at predicting “no propagation” than the other methods. In a nutshell we found exactly what we hoped for: the propagation saw test is not a replacement for the more traditional instability tests, but it is providing some information about the propagation part of the avalanche release process that the other methods are missing.
One further advantage worth mentioning again here is that the propagation saw test works well for weak layers buried at any depth in the snowpack. The other methods are usually limited to the top 1 m or so, where they are very accurate and where human triggering is most likely. The saw test may be most useful for following a lingering layer long after burial and determining whether or not it is a still a concern, to help answer the “What will happen if I find a thin spot and trigger this layer?” question.
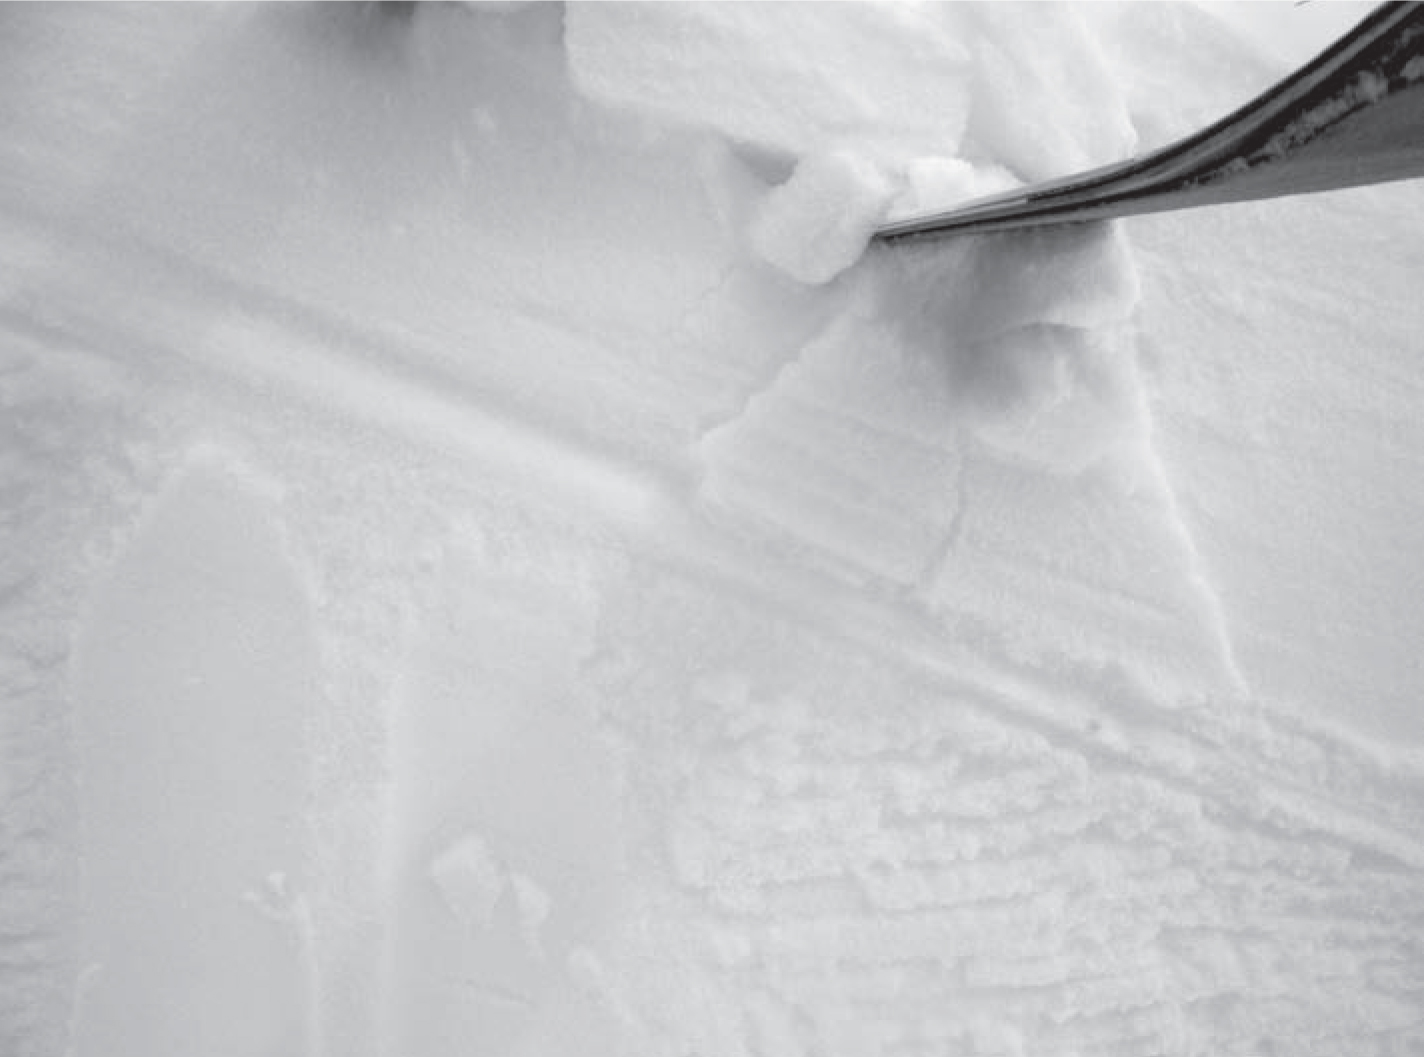
Photo 3: This is an example of excavated tracks from a ski cut where the skier did initiate a weak layer fracture beneath their skis, but the fracture didn’t propagate to release an avalanche. In this case the propagation propensity would be low, even though triggering was easy.
CONCLUSIONS
In summary, the Propagation Saw Test (PST) seems to be able to replicate propagation behaviour likely to be found on nearby slopes. Lots of fracture propagation in the test column, without arrest or interruption, means that propagation propensity is probably high in that snowpack. The test isn’t really providing any useful information about how easy or difficult it might be to initiate or trigger a weak layer fracture, but what might happen if it’s triggered. Remember to use caution interpreting the test results in thin or soft slabs, and that this test is only a tool to help answer a very specific question about the snowpack.
We hope that many professionals will give the PST a try this winter, and we welcome any feedback or comments from anyone. For more detailed information about this project, you can download Dave’s thesis from the ASARC Website (www.ucalgary.ca/asarc). Beware that reading it may result in severe boredom and drowsiness.
AUTHOR INFO
Dave Gauthier, Dept. of Civil Engineering, University of Calgary, davidmgauthier@gmail.com
Bruce Jamieson, Dept. of Civil Engineering, University of Calgary, bruce.jamieson@ucalgary.ca